By Avery Ballmann | Staff Writer
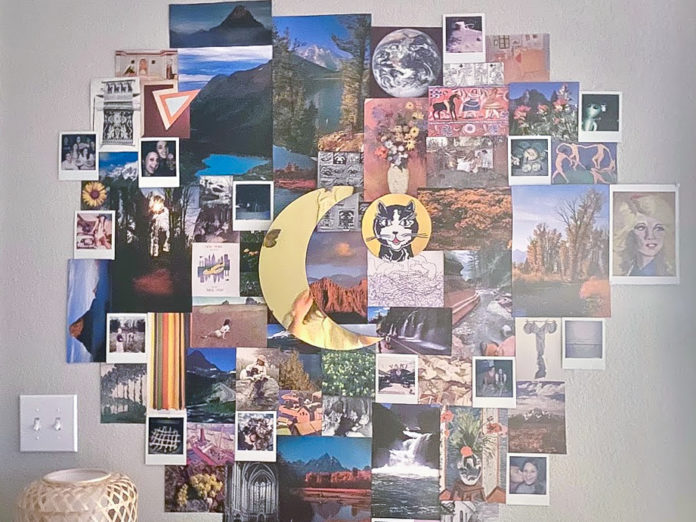
No matter what phase of life or space I am living in, a wall collage must always make an appearance. This trend has become popular over the years, but sadly, people often buy pre-made collages that can be expensive and boring.
I’m here to show you a cheaper and unique way to decorate your room that is personal to you. Collages are easy to put together and can be versatile for anyone. Here is a step-by-step tutorial on how to create one.
Supplies
First, you will need to gather your cheap and easy-to-find supplies: scissors, tape and magazines/picture books.
You will need to have a lot of tape for this project, so I recommend going to Dollar Tree since everything is $1.25.
For magazines and picture books, I usually go to Goodwill, or you can go to your preferred thrift store. At Goodwill, the books range from $1.00 to $2.99, depending on if it’s a hardback or not. If you need cheaper books, there is a free bookshelf in Moody Memorial Library on the Garden Level. These books are no longer being checked out of the library, so they go to this shelf for anyone to take. The only problem with this option is it is a limited selection, but I have had some really great finds.
When looking for books, I always look for the genre that goes with my room. For example, I have a lot of plants and earth tones in my room, so I typically go for gardening and nature books. If you’re into fashion or cars, you can find books that go with that. The whole point of the collage is to make it unique to you.
Design
At this point in the how-to, you have gathered all of your supplies. Now it’s time to tear into these books. As you comb through your stack of books, dog-ear the photos you like, so you can refer to them to keep a cohesive design. When cutting out the pictures, be sure you don’t like the picture on the other side of page. I have had so many incidents where I cut into a picture and realized there was a cooler one on the back. Another tip is to make sure to have a wide variety of sizes for your cutouts. This will help you place these images later.
Now that your pictures are all cut out, place the larger pictures on the wall first, but spread them out to the height and width you want your collage to span. Once you place the larger photos, fill in with the smaller and medium-sized pictures. When taping these to the wall, I usually roll my tape into a bubble and place those on the corners. Once you start placing your photos, it becomes a game of Tetris. Not everything will fit perfectly, so I usually tuck some pictures behind another or cut out smaller pictures.
Final Touches
Now you’ve finished your collage — or so you think. Take a step back and see if your collage is even, the correct size and full of photos you enjoy. You’ll notice some sides may be lopsided or not filled in enough. Luckily this is a simple fix by adjusting the picture or cutting out a couple more. After a few days, some pictures may fall, which is normal if your fan speed is high or there isn’t enough tape, but reinforce them with more tape on the opposite corners or the middle, and it should stick fine.
Branch Out
There are so many benefits to this type of decor because it doesn’t leave wall damage, it’s cost efficient and it can be temporary or long-lasting. And, at least to me, it’s really fun. If that blank wall in your apartment or dorm is staring back at you, don’t get a cheap flag or a pre-made collage; go make one yourself.


