 By Linda Nguyen
A&E Editor
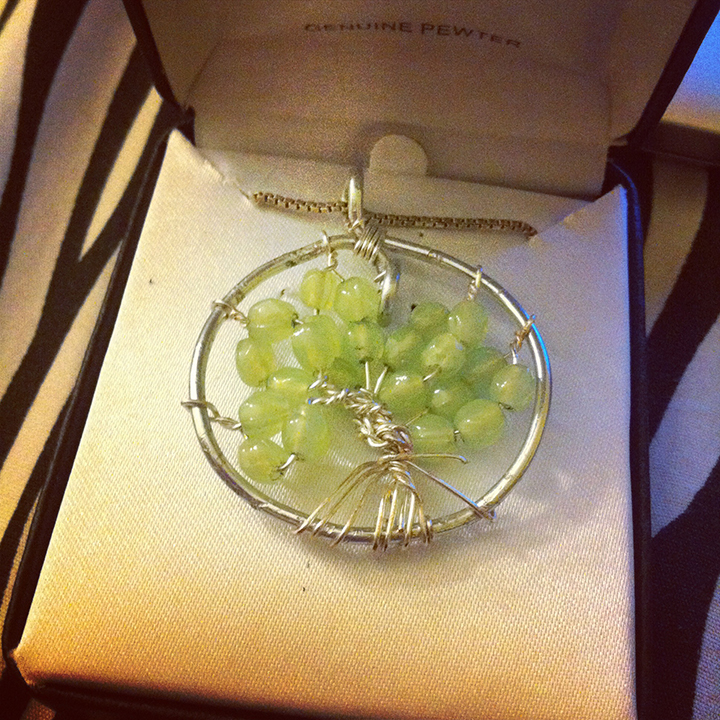
When I saw this necklace on Etsy, I immediately wanted one, but I was not going to pay $75 no matter how much it was calling my name. So I Googled the name hoping to find some instructions on how to make one for myself. I found a YouTube video with step-by-step instructions. The YouTube video explains this DIY the best, but I’ve tried my best to write out the steps and include what I did differently.
Tree of Life Necklace (adapted from CamilleSharon’s YouTube tutorial)
What you need:
- 16 gauge wire (5 pieces at 8-9 inches each and one piece at 6 inches)
- 24 gauge wire (one at 8 inches)
- Beads (I just bought a string of beads at a craft store)
- Pliers
- Something circular to form the hoop around (I used a water bottle)
Instructions:
1. Take the 16 gauge wire and make a loop around one end. She uses a pair of round-nose pliers for this but really a regular pair of pliers would do the trick as well. Or you can invest in a set of crafting pliers. I bought my set for about $10 at Hobby Lobby. Shape the rest of the wire into a circle forming your frame. Make a loop going in the opposite direction on the other end of the wire.
2. The next step was actually the trickiest part for me, but you’re going to essentially wire the two ends together. You accomplish this by taking the smaller, six in. piece of wire, threading it through one of the loops you made and twisting it around a couple times. Then you bring the two ends together and twist the wire around both ends a few times. Finally you twist the wire around the other looped end a few times, securing the wire. After that, you can cut off the excess wire.
3. Now you should have a hoop with two loops at the top. Next you’re going to take one of the 16 gauge wire pieces, fold it in half and twist it around the hoop. Twist it a couple times to secure it to the hoop, but don’t over-twist or you’ll break the wire. Then you’re going to string the beads on. This is where I started diverging from the video. Since my hoop was smaller, I didn’t need as many beads as she was using, nor did I use as much wire as she was using. I’ve found that the best way to do this pendant is to put half the wire branches on one side and the other half on the other side, so you don’t have to worry about try to move the branches to the other side of the pendant at the end. You can secure the wires all at once or do the branches one at a time. I typically do the branches one at a time.
4. Next you’re going to add the beads to the branch wires. This can be modified any way you want, but for this necklace, the order I used from left to right is 3-4-4-5-5 with three branches on the left side and two on the right side. This is entirely dependent on the size of your frame and the size of your beads. I like to eyeball it while I’m working on it so there are just enough beads. Also since the branches are divided in two, I split the number of beads further so I ended up stringing the beads 1-2-2-2-2-2-2-3-2-3.
5. I preferred to do one branch at a time, and from the middle out. So after you string the beads, twist wire to hold the beads in place. Eventually, you’ll have five branches with beads on them.
6. Now you have some more creative freedom. You’re going to twist the excess wires together to form the trunk of the tree until you almost reach the bottom.
7. Then you’re going to fan out the wires and twist them around the bottom of the hoop to form the “roots.” Don’t worry about being too exact because it’s a tree and imperfections add to the beauty of the piece.
8. Finally string a chain through the top loop of the hoop and you’re done.
In her video, she makes a two in diameter pendant. I thought it was a little big for me, so I shaped the hoop smaller to make the pendant smaller. The hoop ends up being the outer frame of the pendant. Therefore I used fewer branch wires and beads than she did in her tutorial.
This project has become one of my go-to projects for unique gifts and the tediousness of twisting the wire, adding the beads, shaping the necklace makes it also ideal when I need something to take my mind off of school and relax a little.
I gave this project a difficulty rating 4.5/5 because of the attention to detail involved in twisting the wires and shaping the pendant.