By Rae Jefferson
A&E Editor
Sometimes I just get the itch to make things. Earlier this week I decided to try my hand at a really cool pin I saw on Pinterest a while back. The project, which involves modifying wall art to look like it was dipped in a bucket of paint, was perfect because I’m in the process of redecorating my apartment for next school year.
One appealing aspect of the project is its versatility. It provides the freedom to use either old photographs grabbed from a local thrift store, or more personalized photographs like family portraits. The picture, frame and paint are able to be customized to fit any theme or color scheme.
I won’t lie — I was pretty nervous starting out, which doesn’t typically happen before I begin a new Pinterest project. I think my hesitation was rooted in the reality that making modifications to anything with paint is essentially permanent. I was worried about possibly ruining the quaint, antique pictures I had found at a local Goodwill.
In the end, I just bit the bullet and jumped right in. What else could I do?
Name of pin
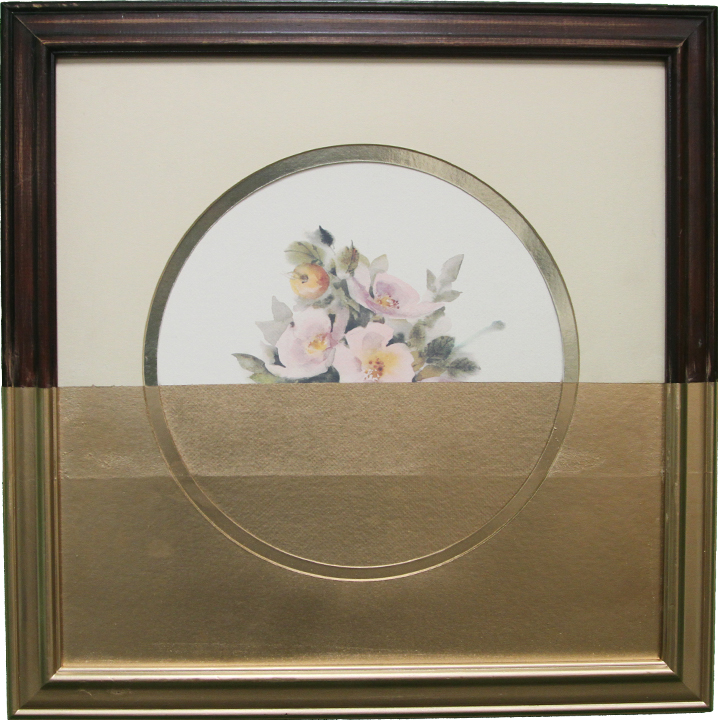
Paint-dipped Picture Frames
Originally pinned from
https://www.brit.co/dipped-framed-photos/?utm_source=feedly
What you need
Photograph or painting in a picture frame, glass removed
Acrylic or spray paint
Painter’s tape
Sponge or paint brush (if using acrylic paint)
Newspaper
Trash bag (optional)
What to do
1. Remove the glass from your picture frame. If you’re using a painting, you’ll probably have to rip the paper off the back and undo all the clasps holding the picture in to get to the glass.
You can also crack the glass and take pieces out the front of the frame without taking apart the backside of the painting. I did this with a smaller frame, placing it inside a trash bag and dropping it on the sidewalk until the glass was broken enough to shake out of the frame. Some pieces of glass are thicker than you might think, so use discretion and be careful if you try to break it.
2. To section off the edge of the frame and picture to be painted, place a strip of painter’s tape across the length of the photograph, sectioning off the edge of the frame and picture to be painted. Be sure the tape sits snuggly against the photo and frame, especially in places where the two meet or if there are crevices in the frame. If spray paint is used, cover the rest of the frame and photo with newspaper to keep it clean.
3. Coat the frame and picture with a generous amount of spray or acrylic paint, but not enough to let the paint run. When using spray paint, be sure to move in long, consistent strokes for even application and drying.
Let the paint dry before you begin a second coat. Repeat this process until the desired coverage is achieved.
4. When the paint is dry to touch, slowly remove the painter’s tape so as not to cause any paint peeling or damage to the photograph.
5. Let the picture dry completely before hanging on a wall.
What went wrong
I tried out three different paintings. The biggest mistake I made was not being more careful about sealing off the edges of the tape in the corners where the frame and image met, as well as on the different reliefs of the frame. I ended up having to move my tape line up and re-spray everything because the paint bled through. This caused there to be a noticeable texture difference between the two places I had my tape.
Fortunately I still like the way it looks, but the nature of the pin requires that the tape be carefully sealed off, so watch out for that.
Final consensus
Most people start a Pinterest project with the expectation of nailing it the first time around, but that’s a silly expectation for some projects. Although it took a few tries before I ended up with a satisfactory result, it was well worth the time and effort.